If you are looking to sell or dispose of your computer and you need to get rid of all the information on first then you need to run a secure erase or secure wipe of the hard drive.
First question we need to answer is why we need to carry out a security wipe. Simple answer is when you just format a hard drive you are just writing a new file table. A file table communicates to the operating system (Windows or Mac OSX) what information is on the hard drive. A quick format simply creates a new one which will have no information about the data on the hard drive, but the data itself is still physically there and with certain recovery programs, it can be read.
A secure wipe not only formats, it adds a layer of data on top of the old files so they are completely over written and cannot be read by any program.
Warning: This will permanently wipe all data on the hard disk including the operating system. If you want to reinstall the operating system make sure you have those disks available and ready.
1. First things first, before you can begin wiping your computer you will need the correct software, for its ease of use and the fact that you can get it for free for home use, we recommend Partition Wizard CD Home edition Boot CD which you can get from here. The page also has instruction on how to make the boot CD from the file.
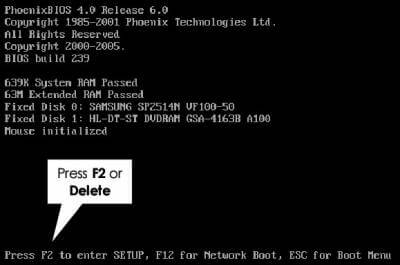
2. To begin you must have your computer switched on. Once it has switched on and loaded up you need to insert the Partition Wizard disk into the computer. Once you have done this you should then restart your computer and then press the correct key to enter the BIOS menu after the computer has restarted. The correct key depends on your model of computer, so you need to check the manual. Most commonly it is F2, Del or F10.

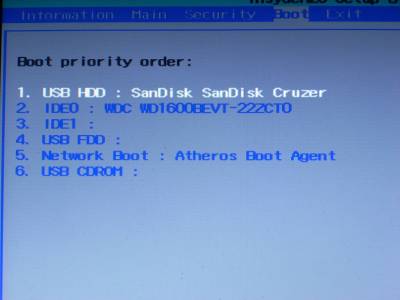
3. Once the BIOS menu has opened you need to select the Boot order option using the computers arrow keys. After you have selected this you must then select the CD drive option and put it first in the list. Then you need to save the changes and restart. Once this is done the computer should restart and begin booting up the CD drive.

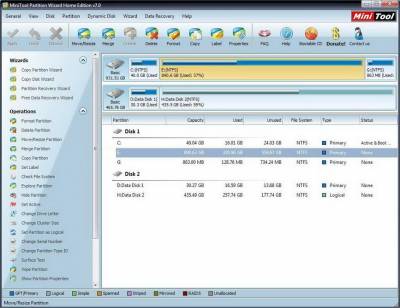
4. As the Partition Wizard CD is already in the optical drive the software will automatically load up. Once it has loaded up you will see all the partitions of all your hard disks. Right click on the picture of the hard disk you want to erase then select “Wipe Disk”. Select the level off security you require, “Fill sectors with Zero” is sufficient for all modern hard drives. Click here for more details. Alternatively you can wipe just the partition with your data on instead of the whole drive. In this case right click on the partition and select “Wipe Partition”. You can repeat the process if you have multiple hard disks in your computer.

5. Click the Apply button on the top left. The software should now begin wiping the selected hard disk or partition partition (this may take 2-3 hours depending ion the size of the hard disk). Once the process is complete, close the software and take out the CD.
Your computer is now completely and securely wiped and can be disposed of or sold on.